
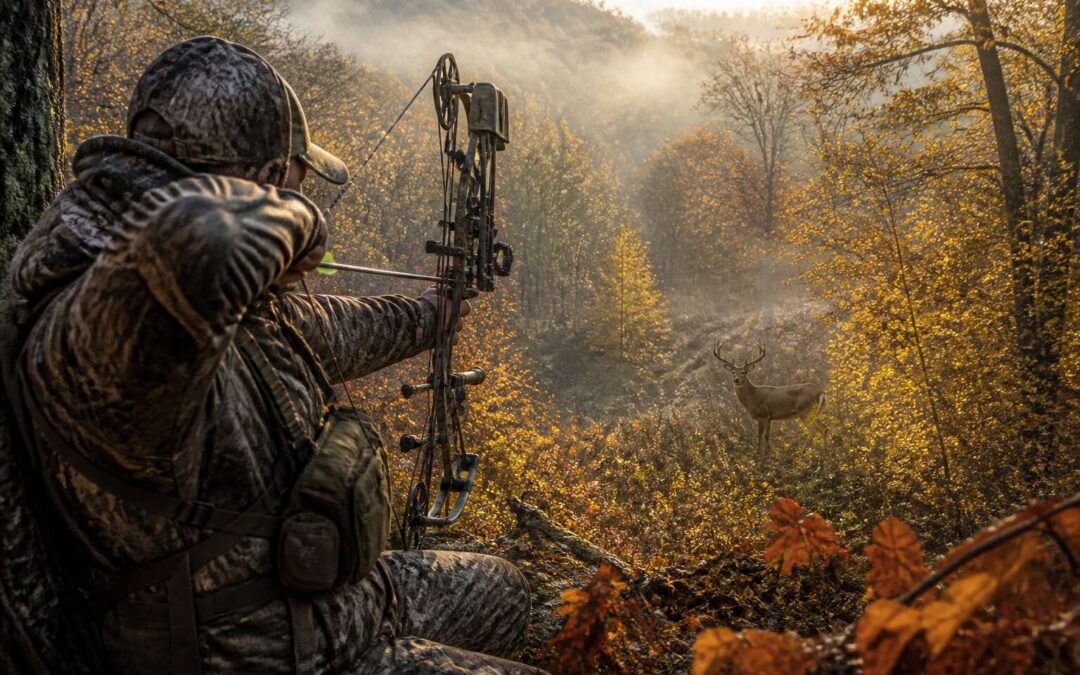
Essential Archery Gear for Whitetail Success
Choosing the Right Bow: Compound, Recurve, or Crossbow
The most common error in bow hunting for deer happens before you reach the bush. Hunters choose a bow that suits a friend’s body and habits, not their own. Recurves are simple and quiet, yet they demand clean form. Compounds let you hold at full draw while you wait for the angle to open. Crossbows free you from the draw cycle entirely, but they carry extra weight on long walks.
I have watched a crossbow save a hunt when a cold front made drawing painful. I have also seen a recurve make a kill where a compound’s vibration spooked the herd.
- Compound: mechanical advantage, compact design
- Recurve: few moving parts, natural release
- Crossbow: stable, scope-ready, fewer body movements
Your physical capacity and hunting style should drive the selection. All three can deliver clean kills if you practice.
Arrow Selection: Spine, Weight, and Broadhead Types
Most whitetail misses trace back to an arrow with the wrong spine. Spine, or the arrow’s stiffness, controls how it flexes around the bow’s riser. A mistuned spine causes erratic flight. For bow hunting for deer, your arrow’s spine must match draw weight and arrow length.
Arrow weight matters for kinetic energy. Heavier arrows carry more momentum through brush, but they drop faster. Lighter arrows fly flatter, yet they deflect on small branches. For whitetail, a midweight arrow around 400 grains balances speed and penetration.
- Fixed blade broadheads: robust, cut on impact, easy to sharpen
- Mechanical broadheads: fly like field tips, open on contact
- Single bevel broadheads: rotate on impact for deeper cuts
Broadhead choice affects the arrow’s behaviour. Your setup must tune without excessive planing. Test each broadhead at various distances. In bow hunting for deer, confidence in your arrow system outweighs raw speed.
Release Aids and Sights for Precision Shooting
A whitetail can react to a bow’s noise in under 0.2 seconds. Before you even see the string settle, the deer is gone. Your release aid shortens that gap by removing your own hesitation. Back tension releases fire only when you reach anchor, which keeps you from punching the trigger. For bow hunting for deer, that mechanical discipline is the difference between a clean shot and a memory.
Sights work the same way. Fixed pin options lock your distances, adjustable models flex with unknown terrain. In South African bush, where shadows shift constantly, a sight with good fiber optics earns its place.
- Pin gap spacing for your expected ranges
- Fiber optic length for low light performance
- Housing ring diameter for aiming precision
The release and sight form a feedback loop. One shaky element sends an arrow wide, and the deer never knows why it survived. That blank space is your problem to solve.
Camo and Scent Control: Staying Undetected
A whitetail’s nose is the true gatekeeper. In the Lowveld, where thermals roll off the koppies at dawn, your camo pattern matters less than your movement discipline. But fabric does the heavy lifting. Choose quiet, brushed materials that break up your outline, not just visually, but against the brush you brush past. Scent control is a ritual, not a spray. Wash your hunting clothes in non UV brightening soap, store them in sealed bags, and treat your boots with activated charcoal inserts. One careless breath of coffee on your collar can undo hours of stillness. For bow hunting for deer, the wind is your compass. Read it constantly. Use scent neutralizers, but trust the breeze more than any bottle. The deer will tell you if you passed.
Mastering Deer Anatomy for Ethical Shots
Vital Organs: Heart and Lung Placement
Few moments in bow hunting for deer carry the weight of the release. Arrow flight ends in a space no larger than a dinner plate. The heart and lungs sit within the thoracic cavity, tucked behind the shoulder blade. When a deer stands broadside, the crease of the shoulder marks the rearmost boundary of this zone. An arrow entering here, between the fourth and fifth ribs, bisects both organs. The heart anchors low, near the breastbone, while the lungs extend upward and rearward. A quartering-toward angle shifts the vital triangle forward, and the arrow must pass through the front of the shoulder. Miss this geometry and the wound becomes survivable, which no ethical hunter accepts.

Consider these dimensions for a mature deer:
- Five inches from the back edge of the shoulder crease to the centre of the lungs.
- Four inches from the top of the chest to the heart.
- Three inches of lung depth when the leg is forward.
For bow hunting for deer, that consistency is the foundation of an ethical shot!
Angle Matters: Quartering To, Away, and Broadside
The broadside shot is the deer’s own surrender. It offers the dinner plate we discussed, a clean lane through the ribs. Quartering away stretches that lane forward, inviting the arrow to slip behind the far shoulder. Quartering toward… that is the geometry exam. The off-side shoulder now guards the vitals. The arrow must pass through the forward shoulder, which can ruin a good broadhead if you hit bone improperly.
- Broadside: The classic. Aim behind the near shoulder.
- Quartering away: Aim for the off-side shoulder to maximize lung damage.
- Quartering toward: Accept only if the near shoulder is not blocking the path.
Mastering these angles separates the shooter from the hunter in any bow hunting for deer scenario. The wrong angle turns a kill shot into a recovery conversation.
The 10-Point Shot Placement Checklist
Every bow hunter for deer knows a clean kill is not luck. It is discipline. I have watched hunters aim at a patch of hair instead of an anatomical landmark. The difference shows in blood trails and recovery times.
Here is the checklist I run through before I ever draw back.
- Confirm the deer is relaxed, not alert.
- Identify the near-side rib cage and its lower third.
- Locate the elbow, which marks the heart’s deepest point.
- Trace the line from the armpit to the opposite shoulder.
- Check for ground obstacles that may deflect a low arrow.
- Reconfirm the body angle, even if you just did.
- Wait for the front leg to step forward.
- Choose the exit point beyond the far shoulder.
- Visualize the arrow path through the chest cavity.
- Breathe out, settle the pin, and commit.
This sequence has saved me from more bad decisions than any equipment upgrade. In bow hunting for deer, precision starts before the shot, not at the release.
Understanding Arrow Penetration and Blood Trails
Arrow penetration in bow hunting for deer is decided by the broadhead’s path through the ribcage. A pass through creates two bleeding edges, which shortens your tracking distance. The exit point reveals the wound channel you never see, so note where the shaft comes out.
Blood trails respond to the injury location. Colour and thickness give an immediate read on the hit:
- Pink and frothy blood: lung tissue
- Dark red and heavy blood: liver
- Watery streaks: muscle or a shallow cut
Spacing between drops matters as much as colour. Tight clusters mean the animal slowed down. Widening gaps mean it is still moving hard, and you should wait longer before taking up the trail.
Practicing Shot Scenarios at Varying Distances
The first time I saw a buck quarter away at forty yards, I understood the real test. The chest cavity shifts with every step, and distance changes how you read that shift. At twenty yards, a broadside deer offers a generous target. At forty yards, the near shoulder hides the vitals, forcing your arrow through a tighter corridor. I have watched hunters group arrows at sixty yards yet struggle to place one shaft at thirty because they never rehearsed the scenario.
Use a life sized target to rehearse these positions:
- Quartering away at twenty yards
- Broadside at thirty yards
- Head on at fifteen yards
The real skill in bow hunting for deer is finding the opening that exists for one second. Distance shrinks that opening in your sight picture, so rehearse each angle until the shot feels automatic.
Pre-Season Scouting and Stand Placement
Reading Rubs, Scrapes, and Tracks
Studies show that a mature buck’s evening movement often follows a corridor of secondary scrapes, yet many who pursue bow hunting for deer fixate on the primary scrape under a single oak. I prefer to trace the rub lines that connect these scrapes, as they expose the buck’s habitual path. Rubs on larger trees indicate an older deer, and the angle of the rub reveals his direction of travel.
When selecting your stand position, seek the funnel where a thicket narrows into a treeline. Tracks sinking deep into soft soil, especially those with a distinct drag, suggest a heavy-bodied animal. Place your stand downwind of that corridor, and resist the urge to overhunt. That discipline rewards patience and precise stand placement!
Mapping Bedding and Feeding Areas
The best stand is the one you scout in August, not the one you discover on opening morning. I spend my pre-season mapping bedding and feeding areas with a simple system. Satellite images give me the layout, but boot prints confirm it. I look for the transition zones where thick cover meets open feeding ground. These edges hold mature bucks. Waterholes concentrate movement in the dry Karoo regions.
- Map each bedding thicket with a GPS pin
- Trace the shortest path from bedding to feeding
- Mark wind direction for every potential stand
This mapping exposes the daily circuit. Bow hunting for deer becomes a waiting game once you know that circuit. A buck that beds in a kloof exits through the same gap each evening. Set your stand downwind of that gap and let the terrain do the work.
Using Trail Cameras to Pattern Bucks
A trail camera card holds more truth than any hunting story. I pull my cards every two weeks, not for the number of photos, but for the pattern beneath them. That is where bow hunting for deer starts.
The cameras go on trails between bedding and water, never on the feeding edge. One camera per entry point. I angle them north to avoid flash washout. The date stamps reveal which bucks move early, which ones slip out after dark.
- Set cameras on pinch points, not open areas.
- Check them at midday to avoid scenting the approach.
- Move stands only after three confirmed daylight crossings.
Every buck has a rhythm. Your stand placement should copy that rhythm, not fight it. Let the cameras tell you when and where. That is the quiet edge.
Wind and Thermal Currents: Stand Positioning
Wind direction dictates every stand decision I make during pre-season scouting. A stand that overlooks a perfect trail is useless if your scent rolls into the bedding area. I map prevailing winds for each site, then track how thermals shift as the sun warms the ground. Morning thermals rise. Evening thermals sink. That changes everything!
I look for trees that offer multiple wind options. One good wind direction is a risk. Two or three gives me flexibility for bow hunting for deer across the season.
- Scent carried downwind of a trail means the deer never knows you are there.
- A ridge edge lifts your scent above the deer’s nose.
- A gully funnels thermals straight through your stand.
Thermals follow the land. A creek bottom pulls cooler air downhill in the evening. A stand placed too low gets betrayed by your own breath.
Setting Up Funnel Points and Travel Corridors
Funnels shape deer movement across a property. A pinch between a marsh and a ridgeline, a ditch that narrows between two fields, these are places deer must pass. I scout them in late winter, before the green flush hides the ground. A few tracks, a single rub, that is enough.
Travel corridors connect bedding to feeding. Deer use them with caution, but they use them daily. My stands go where the corridor narrows. A double trunked oak beside the pinch gives me a clean shot at twenty yards. The approach is quiet, the exit is quiet. This is the essence of bow hunting for deer.
For bow hunting for deer, I look for three things in a funnel point:
- Natural barriers that force movement
- Cover that lets me enter without bumping deer
- A clear shooting lane that matches my range
When to Hunt: Morning vs. Evening Movements
Pre-season scouting is about reading the land’s quiet hours. I walk the edges before sunrise, tracking where the light first touches the ground. A buck’s morning movement follows the dark. They slip back to cover as the sun warms the earth. Evenings differ. Deer linger in open fields, feeding with less urgency as daylight fades.
For bow hunting for deer, I place stands around these patterns. Morning stands sit near bedding areas, catching a buck returning after a night of feeding. Evening stands line the path to food, positioned to intercept movement mid-transition.
In bow hunting for deer, I weigh the moon phase and the barometer. A full moon pushes deer to feed at night, which slows morning action. A rising barometer gets them on their feet early.
- Morning: hunt the route back to bedding
- Evening: hunt the route toward food
Stand placement means knowing which direction deer will face. That decision, made weeks before the season, decides the shot.
Field-Tested Techniques for Close-Quarter Encounters
Still Hunting vs. Stand Hunting: Pros and Cons
Under the acacia canopy, a mere twenty paces separates you from a mature bushbuck. Bow hunting for deer in this terrain demands a choice between stillness and motion. Still hunting allows you to read the wind and creep through cover, yet each step risks a snapped twig. Stand hunting offers elevated patience, but close-quarter encounters often unfold at ground level, where reaction time decides everything.
I weigh these trade-offs:
- Still hunting: active, immersive, ideal for tracking fresh sign.
- Stand hunting: passive, quiet, best for ambush points.
The real test is controlling your breath when an animal halts at fifteen meters! Your success hinges on which tactic matches the exact bush conditions.
Calling Strategies: Grunts, Bleats, and Rattling
Close-quarter calling changes everything. When a buck hangs up at twenty meters, a soft grunt can break the standoff. I prefer a single, low note, not a series. Bleats work best when a doe is visible but unresponsive. Rattling demands restraint. A short clash of antlers, then silence. The bush reacts to confidence, not noise.
For bow hunting for deer here, the key is reading body language. Focus on the animal’s ears and posture:
- Flinching means you are too loud.
- Locked eyes mean shut up and wait.
- Relaxed feeding means you have room to try another sequence.
Calling too often pushes them away. Less is always more in this terrain.
Scent Lures and Mock Scrapes
In the pale hours before dawn, a buck’s nose is a truth teller. A mature animal will pass a broadside shot if the wind carries human sweat. Scent lures are conversations, not tricks. For bow hunting for deer, the message must be local. A few drops of doe urine on a low branch pull a curious buck into arrow range.
Mock scrapes work when they mimic the bush. Choose a shaded overhang with soft earth. Clear the leaves, hang a scent-soaked limb at nose height, then use a stick to disturb the ground like a hoof. Freshen the scrape every two days.
- Doe estrous lure: strongest in late season
- Dominant buck urine: triggers challenge
- Neutral ground scent: steady, low risk
Close quarters in bow hunting for deer demand restraint. One application, one scrape, then silence. Overloading raises suspicion. Watch the ears; if they pin back, your scent story has collapsed.
Decoy Setup for Curious Bucks
Decoys turn a buck’s caution into a focused approach. In the half light, a deer will abandon his circuit when he spots a rival in his feeding lane. For bow hunting for deer, place the decoy quartering away, on the margin of thick cover. Set it at twenty yards from your stand, visible from only one approach.
A curious buck circles downwind, snorts, then commits. He lowers his head and paws the ground. This is the moment. Draw! The decoy holds his attention while you settle the pin. The whole sequence lasts seconds. For bow hunting for deer, that narrow window defines a successful close quarter encounter. Keep the decoy in shadow, never in open sunlight, and refresh its profile with the same scent you wore when setting it.
Drawing Your Bow Without Being Detected
A whitetail’s reaction time averages 0.15 seconds from hearing to movement. For bow hunting for deer, that leaves no margin for error when you start your draw. I have learned to slow everything down! My feet are placed before the buck ever steps into view. I lift my bow only when his head drops to feed. The motion is one continuous arc, not a jerky climb. My shoulder stays relaxed, and my elbow tracks along the line of the arrow.
A single scrape of my sleeve against the riser can send him crashing through the brush. So I clear every branch and twig from my path first. I exhale halfway, then pull to my anchor point. The pin settles on his chest. For bow hunting for deer, this quiet sequence is the difference between a successful harvest and a spooked deer. The buck remains unaware, and the shot breaks clean.
Patience and Timing: When to Release the Arrow
Close quarter encounters test your nerve. A buck at 15 meters leaves no room for hesitation. The arrow must fly the instant his front leg steps forward, exposing the vital zone. For bow hunting for deer, that moment demands absolute focus.
Patience means watching the rhythm of his chewing. Release when his head swings away, not when it locks on you. I count one full breath after the pin settles. The release follows without a thought. These close range shots reward those who wait for the perfect step, not the first open window.
- The forward step after a tail flick signals relaxed movement.
- A raised head with tense ears means wait.
- The hind leg lifting indicates weight shift, the arrow should already be gone.
Bow hunting for deer requires this level of discipline. The closer the encounter, the sharper your timing must become.
Recovery and Processing After the Shot
Tracking Wounded Deer: Signs and Patience
The moment after the arrow finds its mark, the real effort begins. In bow hunting for deer, the urge to follow immediately is overwhelming, but restraint often determines success. A wounded deer that bolts beds down within a short distance if left undisturbed. Give it thirty to forty-five minutes before easing from your stand.
When you reach the impact site, examine the sign carefully. Dark red blood with bubbles suggests a lung hit, while bright red spray indicates an artery. Hair color and texture also reveal the arrow’s path. Mark the last blood you find, then methodically grid the area. Patience here is not passive. It is deliberate, careful effort.
- Check the heaviest blood concentration first
- Look for disturbed leaves or snapped twigs
- Use a flashlight even in daylight to catch reflection
Once you recover the animal, field dress it promptly to cool the carcass. This completes the ethical cycle of bow hunting for deer, and the reward is worth it.
Field Dressing Basics: Tools and Steps
Getting a deer on the ground is only halfway. The next hour decides the quality of the meat and the respect you show the animal. Field dressing basics are not complicated, but they demand sharp tools and a clear head. A fixed blade knife with a four inch gut hook works best. A second smaller knife for fine work saves time. Carry latex gloves and a length of cord for tying off the rectum.
- Roll the deer onto its back with the head uphill.
- Make a shallow cut from the sternum to the pelvis, keeping the blade edge pointing out.
- Cut around the anus and pull the tract free.
- Reach into the chest cavity and sever the windpipe and major blood vessels.
- Tilt the carcass to drain blood and allow heat to escape.
Bowel hunting for deer in South Africa often happens in warm conditions. Do not let the carcass sit. Skin the animal as soon as possible to speed cooling. This also prevents spoiled meat and makes butchering cleaner. Once the hide is off, wipe the cavity dry with a clean cloth. Avoid washing with water, as moisture encourages bacteria. Prop the chest open with a stick and hang the carcass in shade. A game bag keeps flies off while airflow continues the cooling process.
Maintaining your tools matters. A dull knife slips and causes damage. Sharpen your blade before the hunt and again after each animal. Check the gut hook for nicks. Poor equipment turns a quick dressing job into a frustrating exercise. Bow hunting for deer rewards preparation, and that includes knowing how to process what you have earned.
Hanging, Skinning, and Cooling the Carcass
The moment the deer drops, the clock starts. In South Africa, heat is the enemy. You have minutes, not hours, to get the carcass off the ground and into the shade. I have seen fine animals ruined by a slow recovery. Hanging the deer by the hind legs opens the chest cavity and lets trapped heat escape. This is where bow hunting for deer rewards the prepared.
Skinning comes next. Peel the hide away in long, steady pulls. This exposes the muscle to air and speeds cooling dramatically. Once the hide is off, wipe the inside dry with a clean cloth. Do not rinse it with water, moisture invites bacteria.
- Hang the carcass in a breezy, shaded spot.
- Use a game bag to block flies while airflow continues.
- Check the temperature regularly during the first hour.
Proper bow hunting for deer ends with meat that stays clean and cool from the field to the freezer.
Meat Quality: Butchering Cuts for the Freezer
Recovery speed dictates meat quality. A calm, clean carcass yields tender venison. The moment you arrow a buck, your bow hunting for deer efforts hinge on swift field care. Once cooled, butchering begins. Work on a clean surface. Separate the hindquarters, shoulders, and backstraps first. These muscle groups chill fast and retain flavor. For the freezer, trim silver skin and fat, as venison needs no added moisture. Use vacuum sealing to prevent frostbite.
- Remove the tenderloins from inside the pelvic cavity.
- Slice backstraps into medallions across the grain.
- Cube shoulder meat for stews or mince.
- Keep ribs for braising.
Wrap each cut tightly. Label with date and cut. Proper recovery gives you clean, flavorful meat months later.
Hides, Antlers, and Trophy Preparation
Recovery begins the moment the deer drops. The hide carries scars, rubs, and small tangle marks from years of survival. Its care starts without delay. In warm weather, the flesh side demands salt within an hour. Antlers require equal patience.
- The skull is caped above the brow tines.
- Excess tissue is stripped from the bone.
- Gentle boiling preserves the natural colour.
The hide stretches and dries before tanning. Trophy preparation rewards steady hands. Bow hunting for deer produces more than meat. A finished mount, properly cured, holds its shape for decades.